Are you struggling with emails sent from your website landing in your customers’ (or your own) spam box? Chances are, your email settings for your WordPress website are not configured correctly.
What is the problem and how do you fix it?
By default, WordPress sends emails using PHP’s built-in mail function. This means emails lack important headers and are typically sent via your web server or hosting provider, which is often not optimized for email delivery.
A better solution is to send emails via the SMTP protocol, just like you would from an email client. Several WordPress plugins are available for this, allowing you to configure your email with an SMTP provider.
One such provider is Maileroo, our trusted partner for sending emails from our clients’ websites. Maileroo is affordable, fast, reliable, and highly functional.
This short guide will walk you through the necessary steps to significantly improve your website’s email delivery!
Maileroo guide for WordPress websites
Don’t have a Maileroo account yet? Follow this link to create a free SMTP account. With a free account, you can send up to 3,000 emails per month.
Make sure your account is fully activated before proceeding. Maileroo also offers an email marketing product, but this guide focuses on the Email API service.
Adding and verifying your domain
Go to Domains and click Add Domain. A pop-up will appear where you can enter your domain name. After clicking the button below the form field, a page will open with various DNS records.

Maileroo DNS records
The first two records (SPF and DKIM) are crucial for verifying your domain. You may also want to add the following:
MX – if you want to use inbound email routing
DMARC – increasingly required by email marketing providers for authentication
Click/Open Tracking – allows you to use your own subdomain for tracking email interactions
Once you have added the first two DNS records (for example, via Cloudflare), you can verify them using the Verify DNS records button. You will know it was successful when the labels on the left turn green (Verified). You will also receive an email confirmation.
Tracking, API, and SMTP settings
The next steps are:
Disable Click/Open Tracking – Go to the Settings tab and click Disable Tracking. We recommend turning this off as it may violate GDPR regulations if used without recipient consent.
SMTP settings – Under the SMTP Accounts tab, create your first SMTP account. Choose a username and password—these will be used later in the plugin settings on your website.
API key – Alternatively, you can use the Maileroo API to send emails. It works just as well as SMTP but also allows you to use features like Maileroo’s email templates.
Installing the Maileroo SMTP plugin
Now that your domain is fully configured, you can start sending emails from your WordPress website using Maileroo.
In your WordPress dashboard, go to Plugins > Add New Plugin and search for “Maileroo.”
Install and activate the plugin.
Click Simple SMTP in the left menu to access the settings.
You will now see a settings screen where you can choose between SMTP and Maileroo API. Enter the details you created earlier for either option.
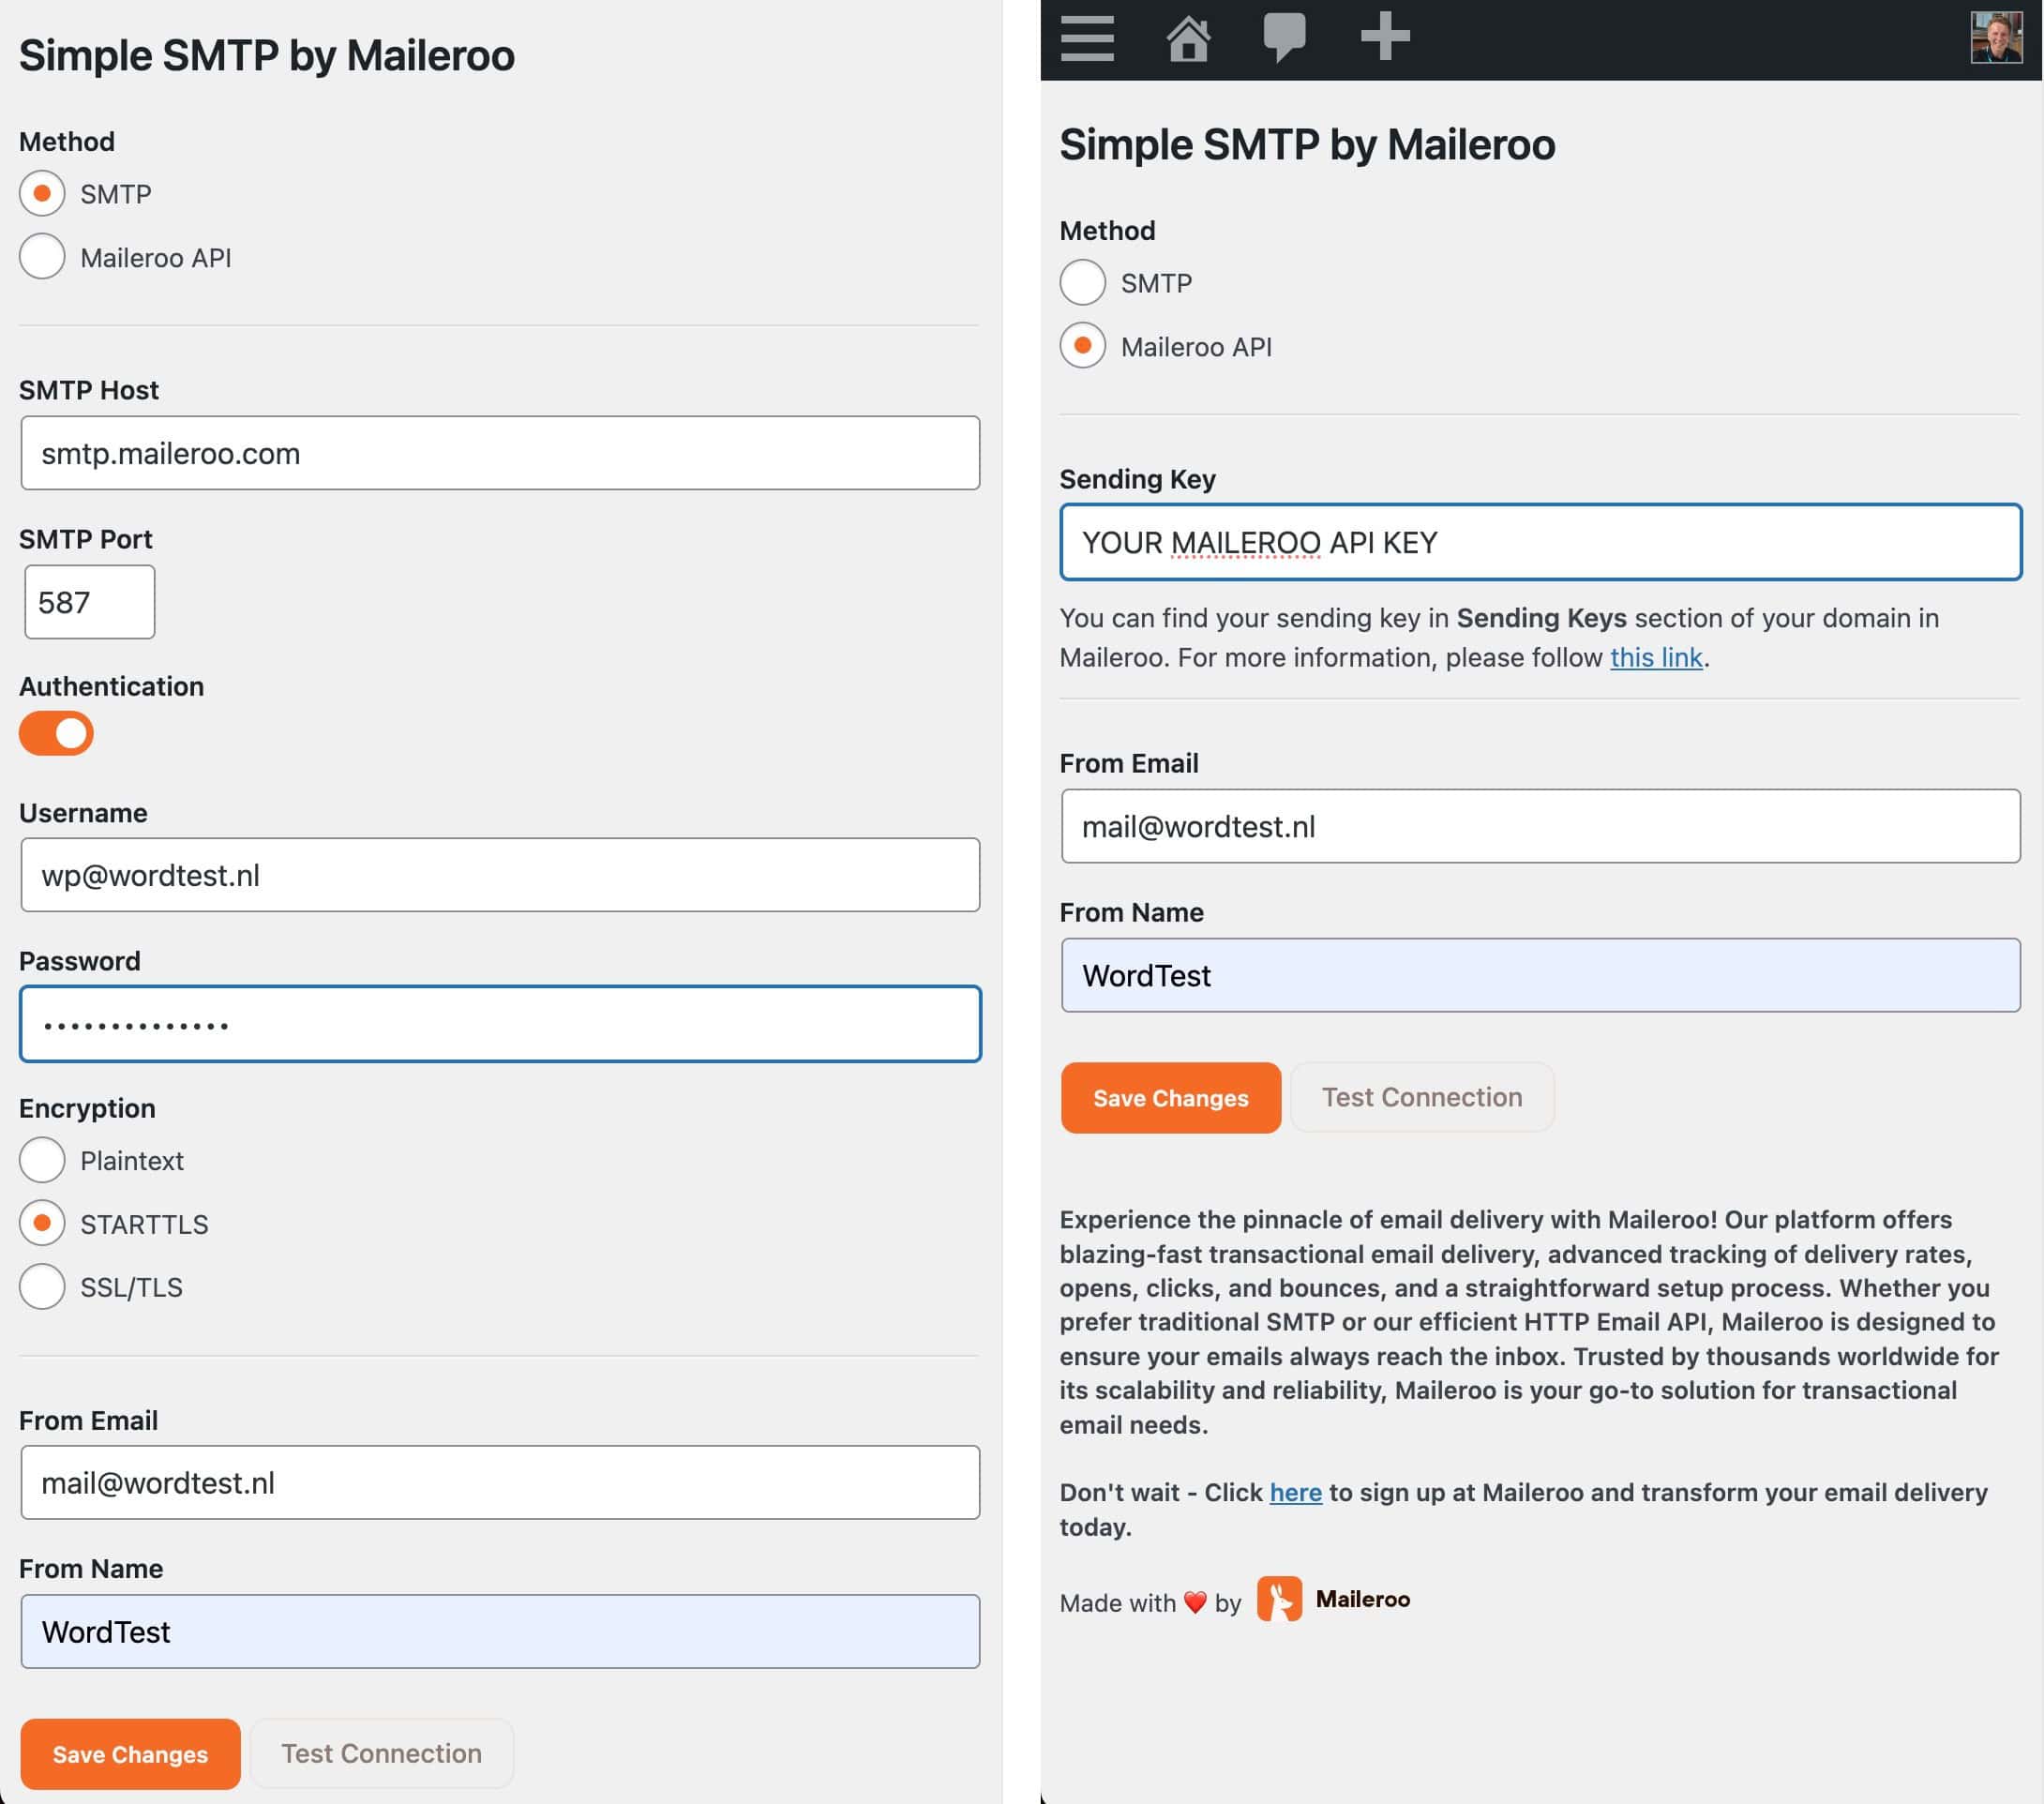
Maileroo SMTP Plugin Settings
Testing your settings
After clicking Save Changes, you can test your settings. I usually do this with a Gmail account, as it allows you to quickly verify if DKIM and SPF authentication are correctly configured.
You can also check in Maileroo to see if your message was successfully sent. Navigate to Domain > Your Domain > Logs to view a list of recent emails. Click View Events on a specific email to confirm whether it was sent and delivered successfully. If there was a delivery failure, the reason will be displayed there as well.
Published in: Tutorials